Working with Lights
This tutorial demonstrates lighting of scenes and objects in Habitat -- creation, placement, configuration, and manipulation of light sources and shaders.
The example code below is runnable via:
$ python examples/tutorials/lighting_tutorial.py
First, import necessary modules, define some convenience functions, and initialize the Simulator and Agent.
import math
import os

import magnum as mn
import numpy as np
from matplotlib import pyplot as plt

import habitat_sim
from habitat_sim.gfx import LightInfo, LightPositionModel
from habitat_sim.utils.common import quat_from_angle_axis

dir_path = os.path.dirname(os.path.realpath(__file__))
data_path = os.path.join(dir_path, "../../data")
output_path = os.path.join(dir_path, "lighting_tutorial_output/")

save_index = 0


def show_img(data, save):
    plt.figure(figsize=(12, 12))
    plt.imshow(data, interpolation="nearest")
    plt.axis("off")
    plt.show(block=False)
    if save:
        global save_index
        plt.savefig(
            output_path + str(save_index) + ".jpg",
            bbox_inches="tight",
            pad_inches=0,
            quality=50,
        )
        save_index += 1
    plt.pause(1)


def get_obs(sim, show, save):
    obs = sim.get_sensor_observations()["rgba_camera"]
    if show:
        show_img(obs, save)
    return obs


def place_agent(sim):
    # place our agent in the scene
    agent_state = habitat_sim.AgentState()
    agent_state.position = [5.0, 0.0, 1.0]
    agent_state.rotation = quat_from_angle_axis(
        math.radians(70), np.array([0, 1.0, 0])
    ) * quat_from_angle_axis(math.radians(-20), np.array([1.0, 0, 0]))
    agent = sim.initialize_agent(0, agent_state)
    return agent.scene_node.transformation_matrix()


def make_configuration():
    # simulator configuration
    backend_cfg = habitat_sim.SimulatorConfiguration()
    backend_cfg.scene_id = "data/scene_datasets/habitat-test-scenes/van-gogh-room.glb"

    # agent configuration
    sensor_cfg = habitat_sim.CameraSensorSpec()
    sensor_cfg.resolution = [1080, 960]
    agent_cfg = habitat_sim.agent.AgentConfiguration()
    agent_cfg.sensor_specifications = [sensor_cfg]

    return habitat_sim.Configuration(backend_cfg, [agent_cfg])
Scene Lighting
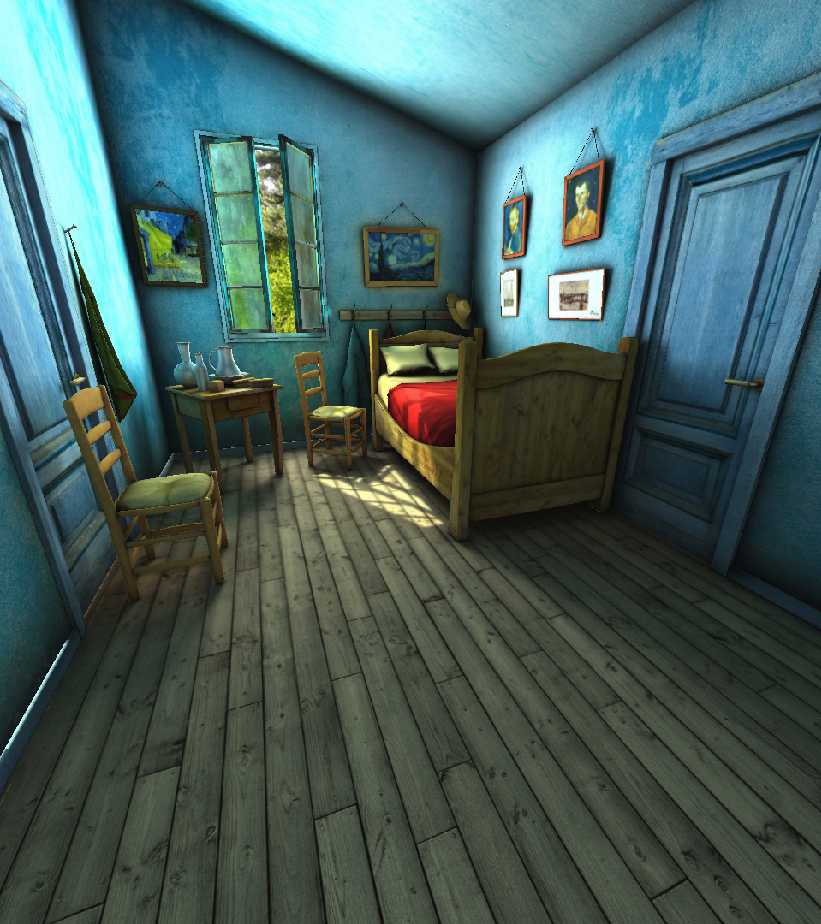
By default, the scene will be shaded with no lights using the NO_LIGHT_KEY default lighting setup. This configuration is ideal for scene assets with illumination baked into textures (e.g. building scans such as MP3D).
    # create the simulator and render flat shaded scene
    cfg = make_configuration()
    sim = habitat_sim.Simulator(cfg)
    agent_transform = place_agent(sim)
    get_obs(sim, show_imgs, save_imgs)
To use a custom light setup for the scene, edit the SimulatorConfiguration.scene_light_setup option when creating/reconfiguring the Simulator. This option is ideal for scenes without illuminated textures, to create a custom tailored lighting configuration for the scene, or for domain randomization. The second example below demonstrates a custom low-light setup for the room with a point light source originating at the window. A “0” in the 4-th entry of the vector parameter indicates that this is a point lights source position. Alternatively, a “1” in this entry would indicate a directional light source with no position and vector direction.
Note that while the scene’s light setup can be modified dynamically during runtime, the Simulator will need to be reconfigured to switch the scene’s light setup key. Also, due to asset loading specifics the Simulator must be closed and re-initialize to swap between Flat and PBR (or Phong) shading setups.
    # close the simulator and re-initialize with DEFAULT_LIGHTING_KEY:
    sim.close()
    cfg = make_configuration()
    cfg.sim_cfg.scene_light_setup = habitat_sim.gfx.DEFAULT_LIGHTING_KEY
    cfg.sim_cfg.override_scene_light_defaults = True
    sim = habitat_sim.Simulator(cfg)
    agent_transform = place_agent(sim)
    get_obs(sim, show_imgs, save_imgs)

    # create and register new light setup:
    my_scene_lighting_setup = [
        LightInfo(vector=[0.0, 2.0, 0.6, 1.0], model=LightPositionModel.Global)
    ]
    sim.set_light_setup(my_scene_lighting_setup, "my_scene_lighting")

    # reconfigure with custom key:
    new_cfg = make_configuration()
    new_cfg.sim_cfg.scene_light_setup = "my_scene_lighting"
    new_cfg.sim_cfg.override_scene_light_defaults = True
    sim.reconfigure(new_cfg)
    agent_transform = place_agent(sim)
    get_obs(sim, show_imgs, save_imgs)
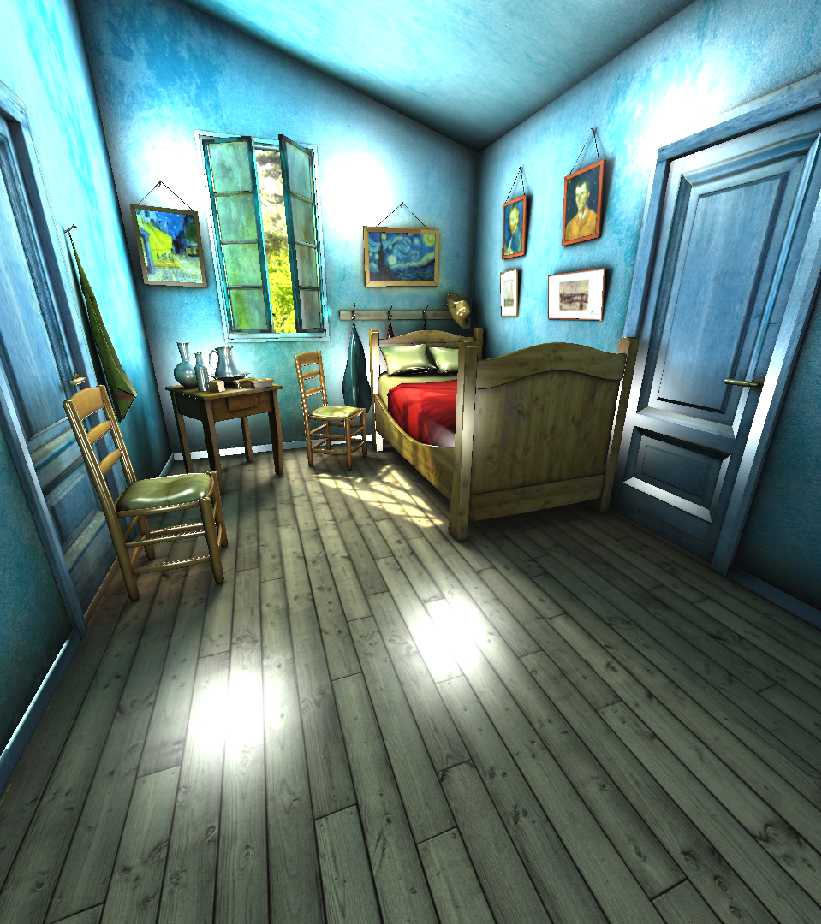 After loading with DEFAULT_LIGHTING_KEY.
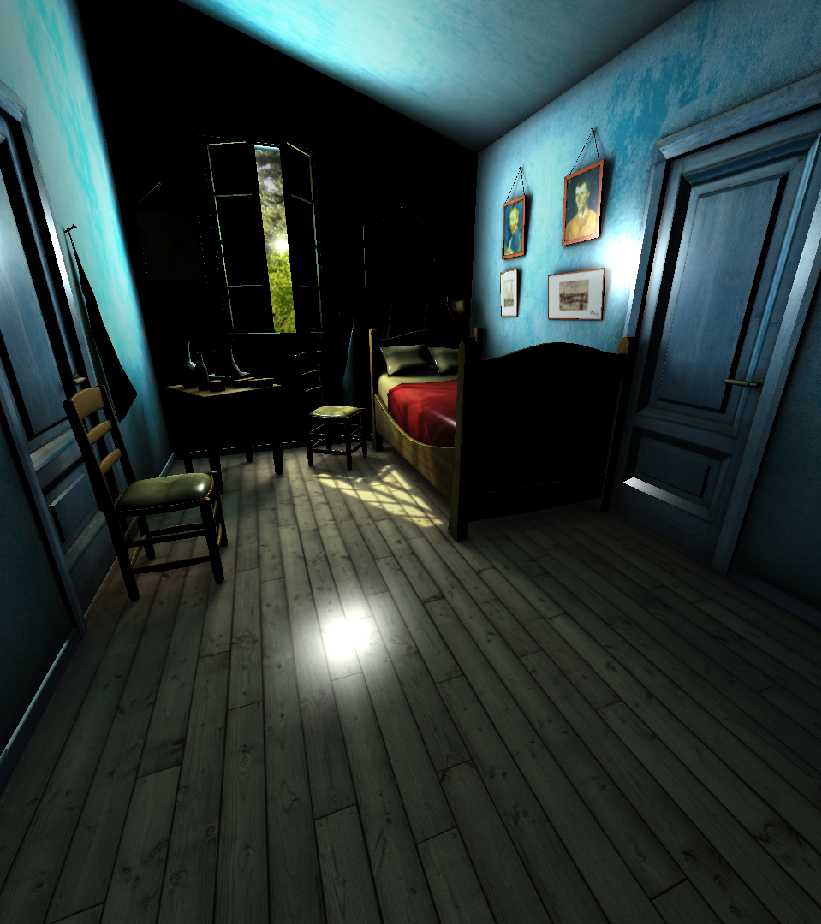 After swapping to custom
 my_scene_lighting.Object Lighting
It is often desirable to add new objects (such as furniture, robots, or navigation targets) to the scene which are not part of the static environment mesh. These objects are handled separately from the scene and can be configured with the same or different light setups.
By default, object assets are instanced with PBR shading compatibility. This is not ideal for assets with illumination baked into textures. Objects can be loaded for Flat shading by setting the object template’s ObjectAttributes.force_flat_shading property before instancing the asset. Alternatively, this option can be set in the object template’s configuration file:
E.g. in my_object.object_config.json
{
    "render_asset": "my_object.glb",
    "force_flat_shading": true
}
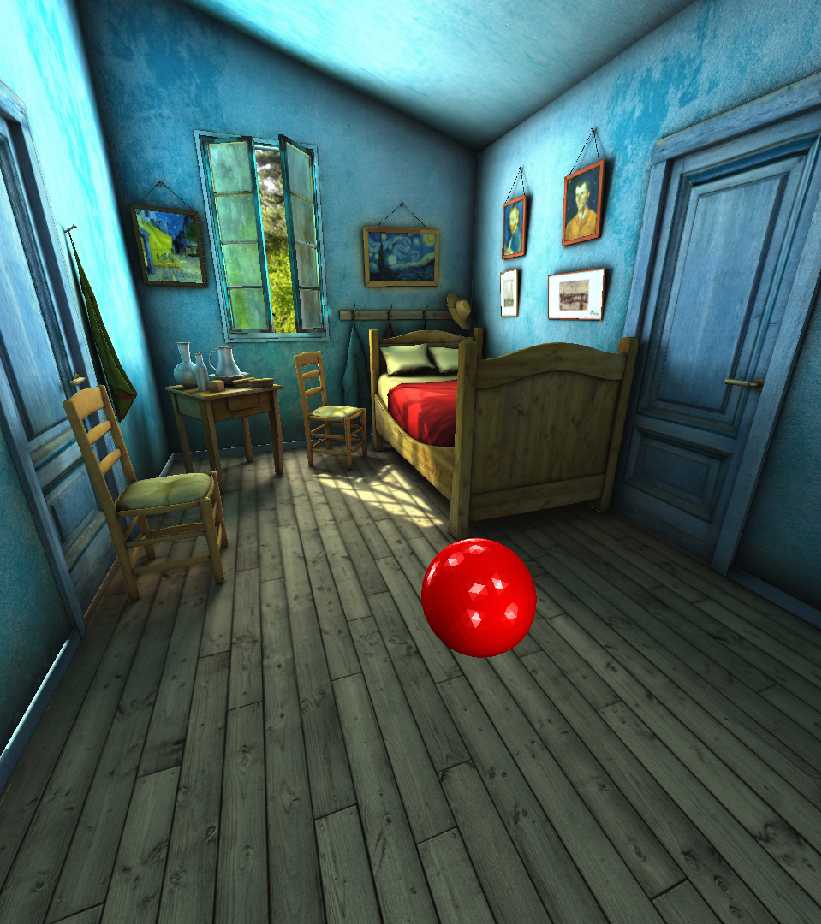
By default, new objects with Phong and PBR shading enabled are added to the scene with the DEFAULT_LIGHTING_KEY setup.
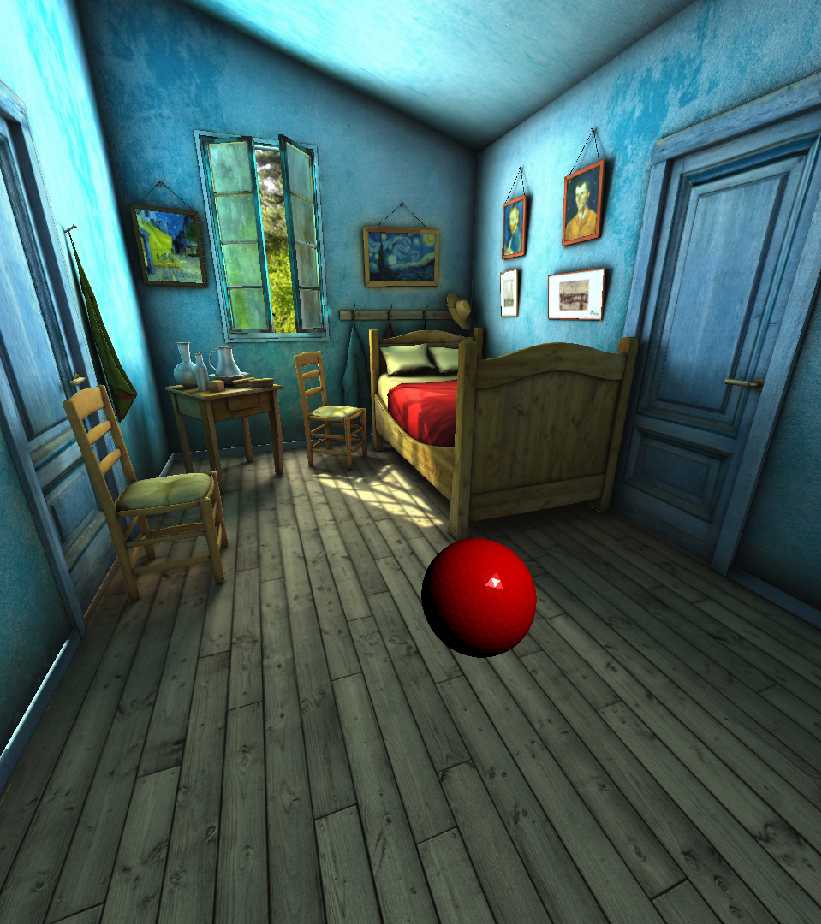
    # get the rigid object attributes manager, which manages
    # templates used to create objects
    obj_template_mgr = sim.get_object_template_manager()
    # get the rigid object manager, which provides direct
    # access to objects
    rigid_obj_mgr = sim.get_rigid_object_manager()

    # load some object templates from configuration files
    sphere_template_id = obj_template_mgr.load_configs(
        str(os.path.join(data_path, "test_assets/objects/sphere"))
    )[0]
    chair_template_id = obj_template_mgr.load_configs(
        str(os.path.join(data_path, "test_assets/objects/chair"))
    )[0]

    # create a sphere and place it at a desired location
    obj_1 = rigid_obj_mgr.add_object_by_template_id(sphere_template_id)
    obj_1.translation = [3.2, 0.23, 0.03]

    get_obs(sim, show_imgs, save_imgs)
The default light setup can be modified to achieve a desired illumination effect by calling Simulator.set_light_setup() with an empty key.
    # create a custom light setup
    my_default_lighting = [
        LightInfo(vector=[-2.0, -2.0, -1.0, 0.0], model=LightPositionModel.Camera)
    ]
    # overwrite the default DEFAULT_LIGHTING_KEY light setup
    sim.set_light_setup(my_default_lighting)

    get_obs(sim, show_imgs, save_imgs)
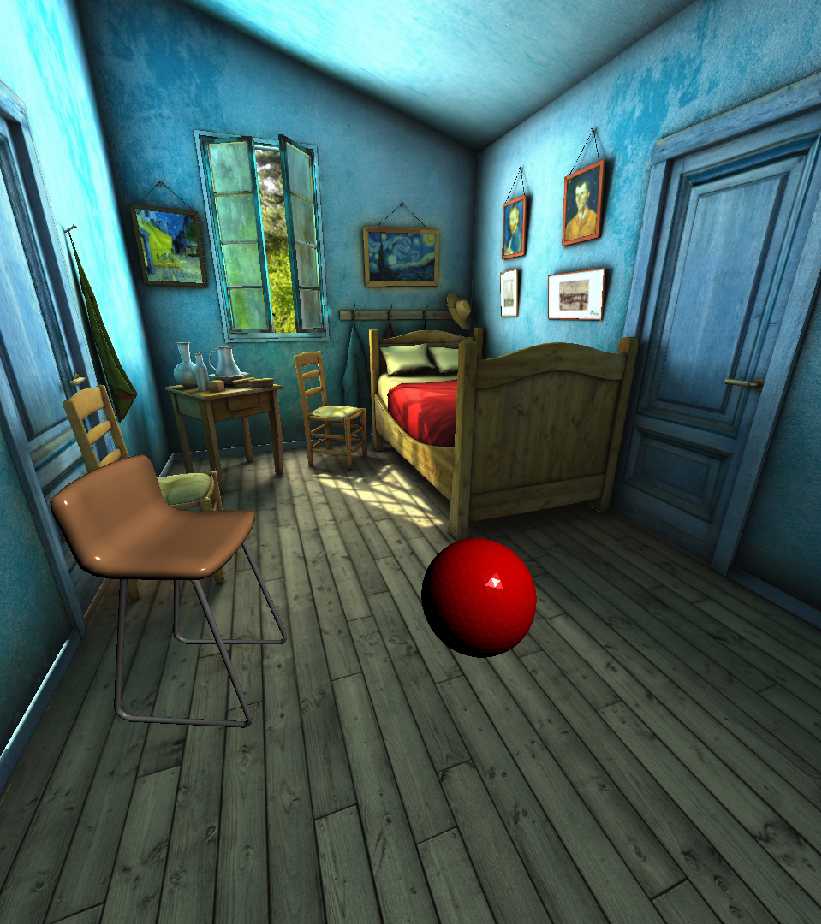
Newly added objects will use the current default lighting setup unless otherwise specified.
    # create a chair and place it at a location with a specified orientation
    obj_2 = rigid_obj_mgr.add_object_by_template_id(chair_template_id)
    obj_2.rotation = mn.Quaternion.rotation(mn.Deg(-115), mn.Vector3.y_axis())
    obj_2.translation = [3.06, 0.47, 1.15]

    get_obs(sim, show_imgs, save_imgs)
Multiple Light Setups
In some cases (such as when emulating room-level lighting for scenes with multiple rooms), one light setup may not be sufficient to achieve a desired visual result. To use multiple custom lighting setups at the same time, simply register a name after creation.
    light_setup_2 = [
        LightInfo(
            vector=[2.0, 1.5, 5.0, 1.0],
            color=[0.0, 100.0, 100.0],
            model=LightPositionModel.Global,
        )
    ]
    sim.set_light_setup(light_setup_2, "my_custom_lighting")
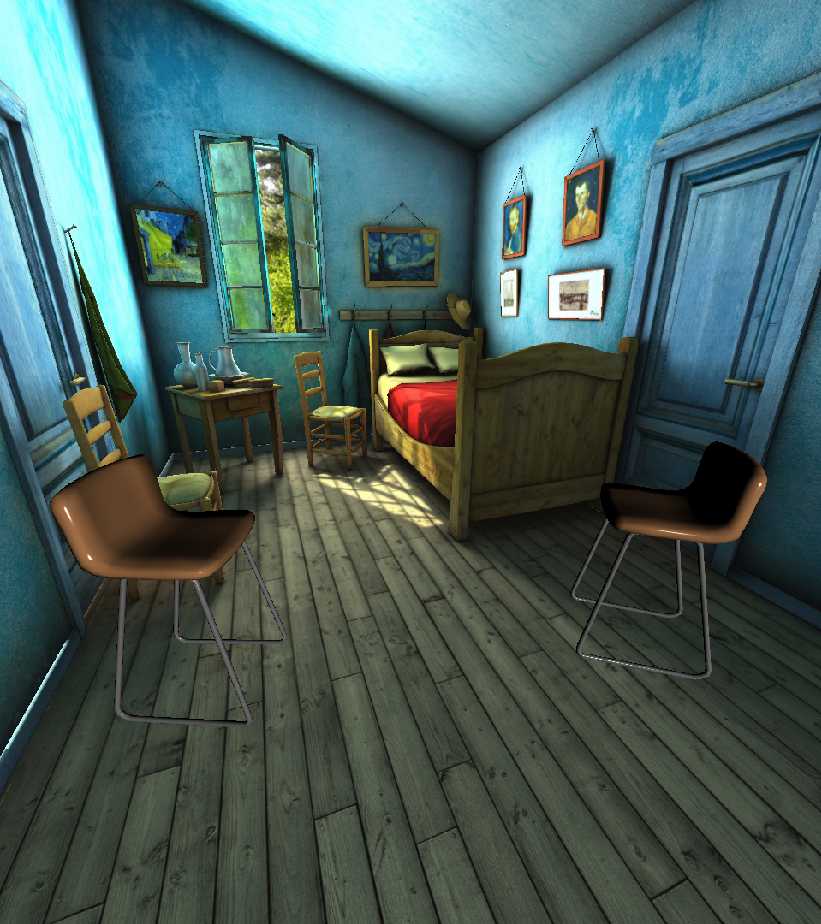
To use a specific light setup for a new object, pass in the name as a parameter to Simulator.add_object.
    # create and place 2 chairs with custom light setups
    chair_1 = rigid_obj_mgr.add_object_by_template_id(
        chair_template_id, light_setup_key="my_custom_lighting"
    )
    chair_1.rotation = mn.Quaternion.rotation(mn.Deg(-115), mn.Vector3.y_axis())
    chair_1.translation = [3.06, 0.47, 1.15]

    chair_2 = rigid_obj_mgr.add_object_by_template_id(
        chair_template_id, light_setup_key="my_custom_lighting"
    )
    chair_2.rotation = mn.Quaternion.rotation(mn.Deg(50), mn.Vector3.y_axis())
    chair_2.translation = [3.45927, 0.47, -0.624958]

    get_obs(sim, show_imgs, save_imgs)
Retrieve a copy of an existing configuration with Simulator.get_light_setup() to query light properties, make small changes, or reduce the effort of creating a new light setup from scratch.
    existing_light_setup = sim.get_light_setup("my_custom_lighting")

    # create a new setup with an additional light
    new_light_setup = existing_light_setup + [
        LightInfo(
            vector=[0.0, 0.0, -1.0, 0.0],
            color=[1.6, 1.6, 1.4],
            model=LightPositionModel.Camera,
        )
    ]

    # register the old setup under a new name
    sim.set_light_setup(existing_light_setup, "my_old_custom_lighting")
Updates to existing light setups will update all objects using that setup, allowing control over groups of objects with consistent lighting.
    # register the new setup overwriting the old one
    sim.set_light_setup(new_light_setup, "my_custom_lighting")

    get_obs(sim, show_imgs, save_imgs)
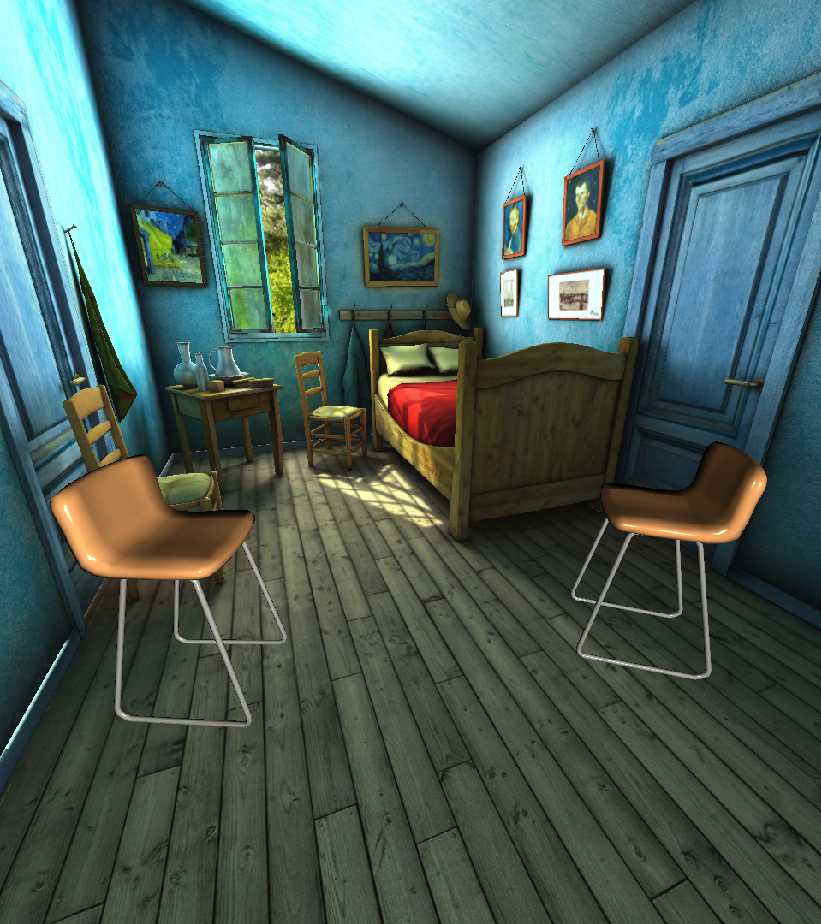
Some situations may warrant a change in the lighting setup for a specific object already instanced into the scene (such as when moving an object to a new room).
The light setup any individual object uses can be changed at any time with Simulator.set_object_light_setup.
    chair_1.set_light_setup(habitat_sim.gfx.DEFAULT_LIGHTING_KEY)

    get_obs(sim, show_imgs, save_imgs)

Feature Detail Review
A light setup consists of a set of LightInfo structures defining the common configuration of a set of point lights used to render objects in a scene. Once defined and registered, a light setup can be assigned to any subset of objects in the scene, including the scene asset itself.
Each LightInfo structure in a light setup defines the color, vector (either [position, 0] or [direction, 1]), and LightPositionModel of a single point or directional light source. The LightPositionModel defines the coordinate frame of the light.
Each light setup is registered in the simulator via a unique key. Two default lighting setups are pre-defined:
-
2 white, GLOBAL lights defined here.
-
0 lights (for Flat shaded assets).
Additional custom setups can be created and registered via the Simulator.set_light_setup() function:
sim.set_light_setup(new_light_setup, "my_custom_lighting_key")
Any existing light setup can be queried with Simulator.get_light_setup():
custom_light_setup = sim.set_light_setup("my_custom_lighting_key")
An existing object’s light setup can be modified at any time with Simulator.set_object_light_setup:
sim.set_object_light_setup(my_object_id, "my_custom_lighting_key")